Hosting a Static Site on AWS

Table of Contents
§ Set up your domain name and AWS Route 53
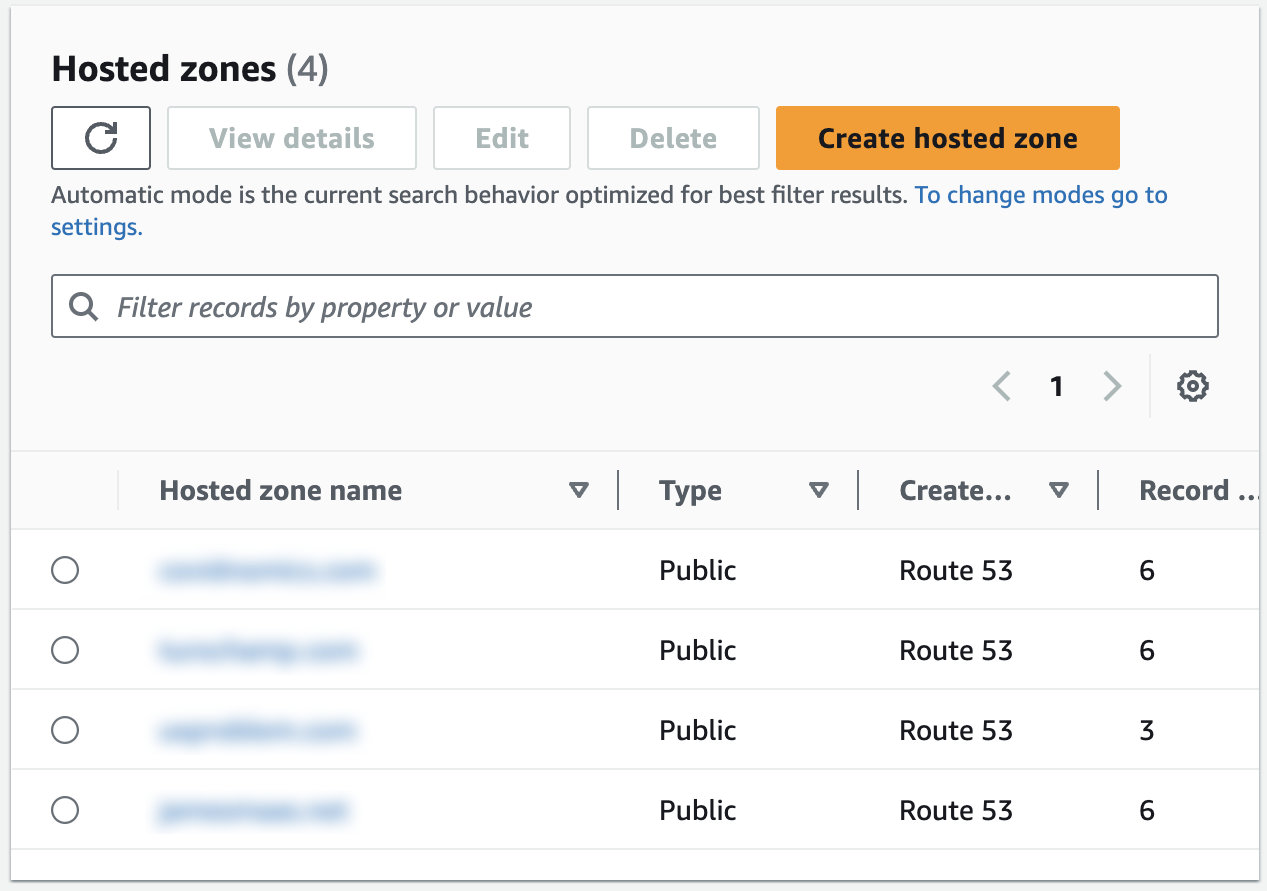
Before you can set up DNS listing with your domain provider, you need to create the DNS listings in Amazon Route 53 Dashboard. Got to 'AWS > Route 53 Dashboard > Hosted Zones'. Select 'Create hosted zone'.
Enter the Domain name, then select 'Create Hosted Zone' below.
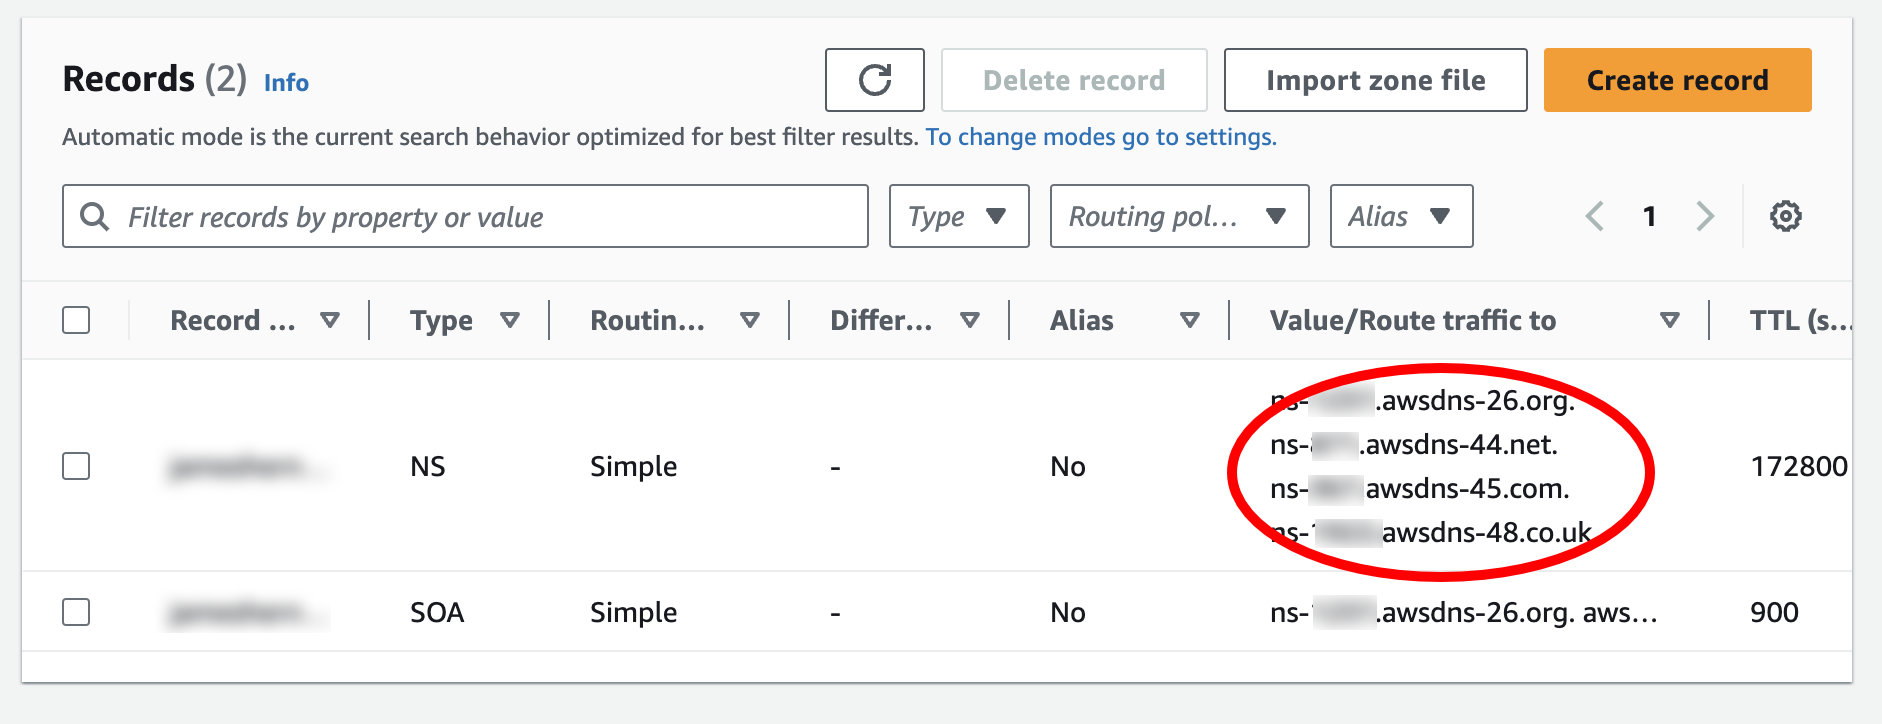
As soon as you do this, you will see NS (nameservers) records for your domain. Take down this information, because you will use it for your DNS settings at your registrar.
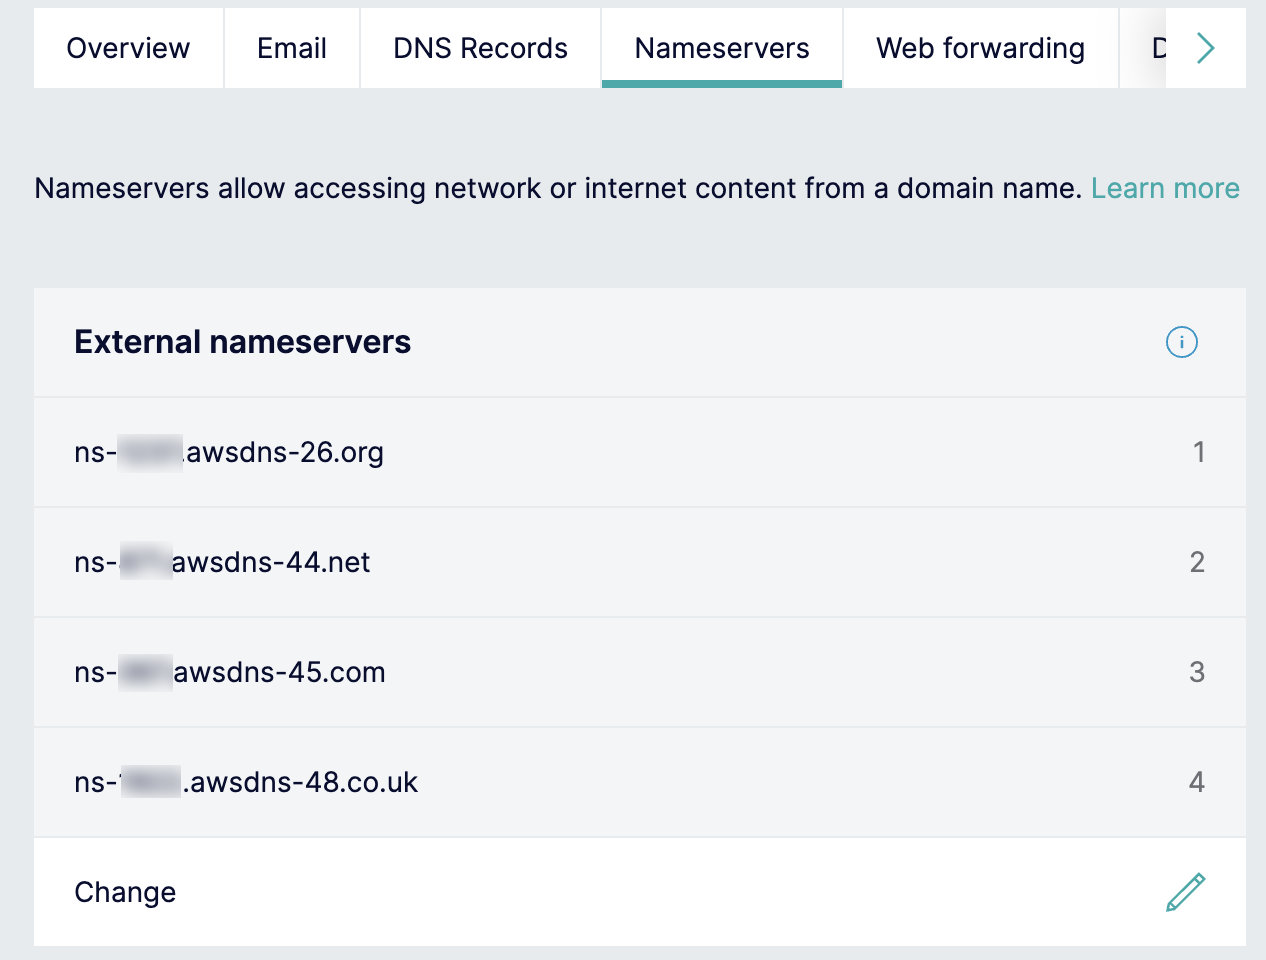
Once you receive the Nameservers records, go to your domain registrar. Select you want to use custom Nameservers. Enter the NS info you got from Amazon S3.
§ Create S3 Bucket
Go to Amazon S3 and select 'Create bucket'.
Select an AWS Region closest to you or in your time zone.
Name your bucket the URL of your website, like mywebsite.com.
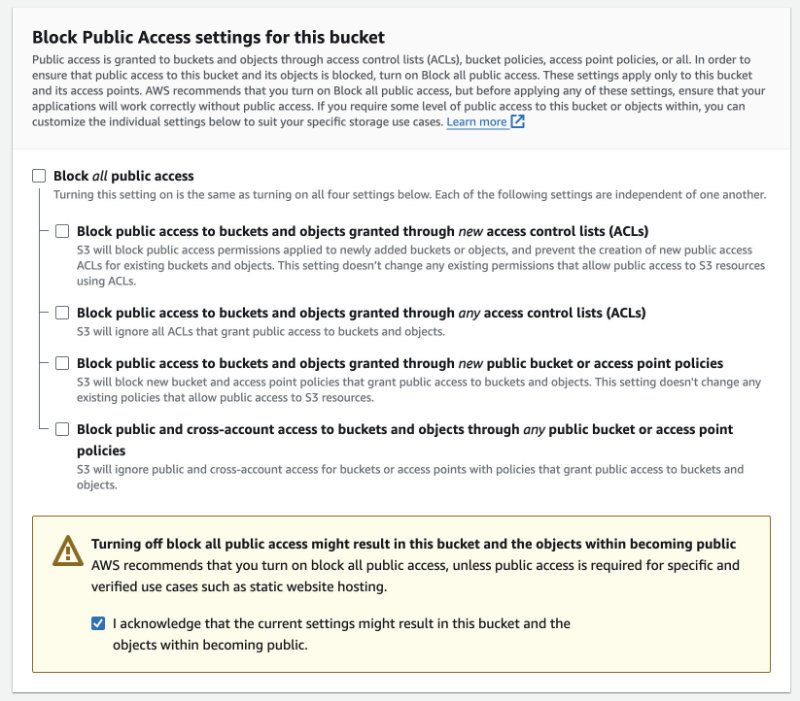
Deselect 'Block all public access' and click acknowledgement below.
Leave Bucket Versioning off
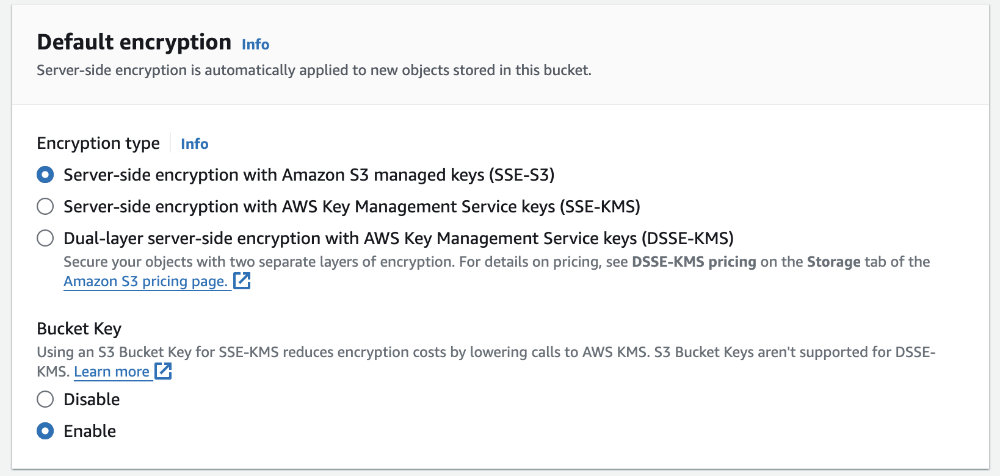
Keep Default encryption settings
Click 'Create bucket'.
Click on your bucket and go to 'Properties' tab.
Click to Edit Static website hosting, click Enable, for Index document make sure it says index.html, and leave all other defaults the same, and Save changes.
Go to Permissions > Bucket Policy.
Select Bucket policy, and use this template for a Policy:
{
    "Version": "2012-10-17",
    "Id": "Policy1701746151503",
    "Statement": [
        {
            "Sid": "Stmt1701746147603",
            "Effect": "Allow",
            "Principal": "*",
            "Action": "s3:GetObject",
            "Resource": "arn:aws:s3:::yourdomain.com/*"
        }
    ]
}
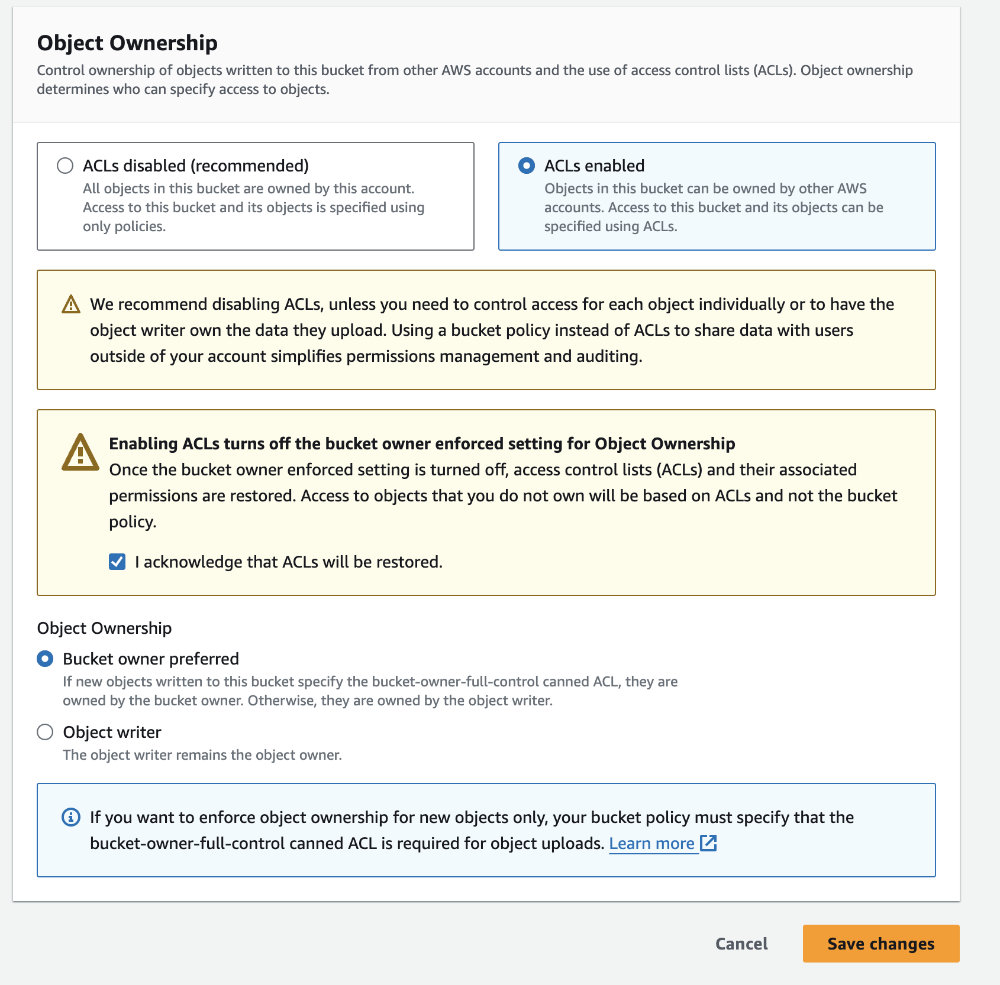
Edit Object Ownership, select ACS enabled, click the acknowledgement, and keep Bucket owner preferred. Save Changes.
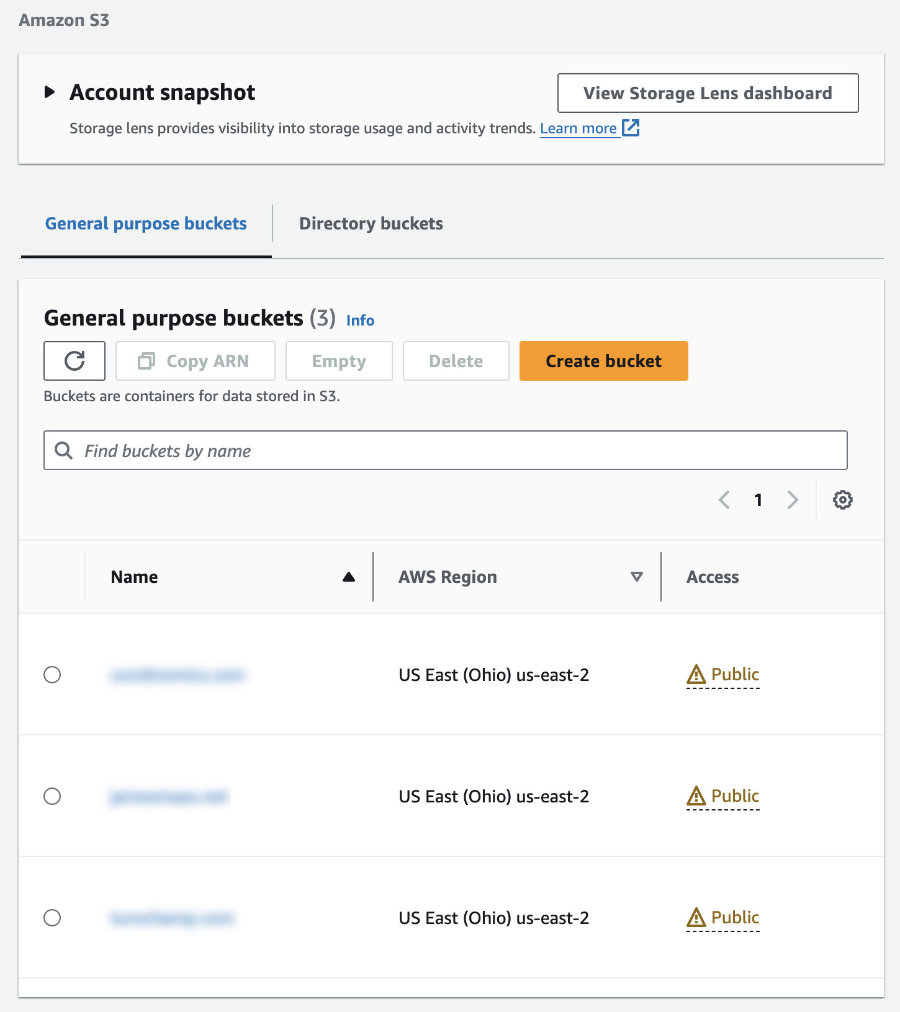
At this point your bucket should appear Public.
§ Push Static Site to S3
This is where you have a few options to push your static site. For this article, we are going to use the AWS command line to sync your static directory to the S3 bucket.
aws s3 sync dist s3://yourdomain.com --delete§ Certificate Manager
We're going to need a an SSL/TLS Certificate. Go to Certificate Manager and hit 'Request'.
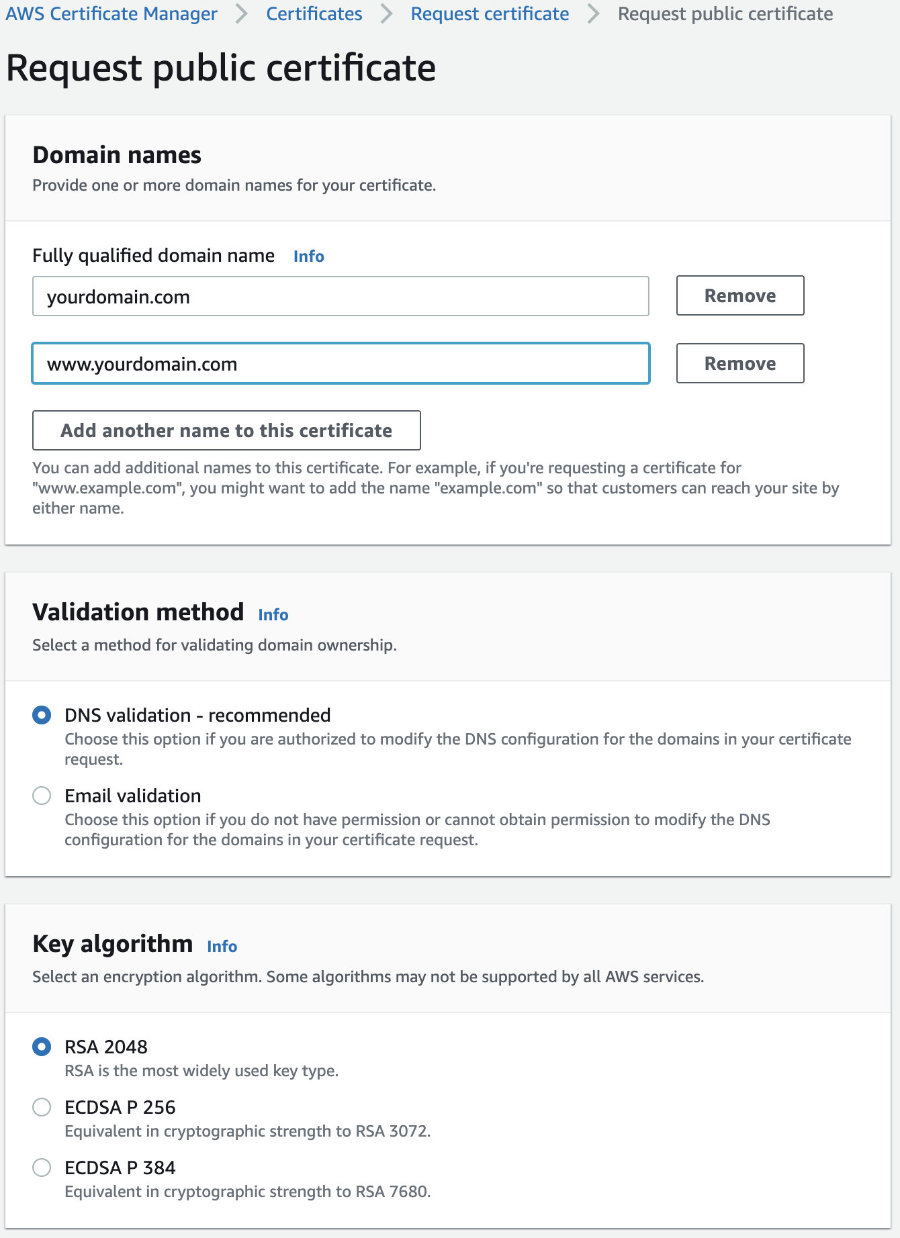
Select 'Request Public Certificate' and hit 'Next'.
Add yourdomain.com and www.yourdomain.com as fully qualified domain names.
Keep all the other defaults. Finally select the 'Request' button at the bottom right.
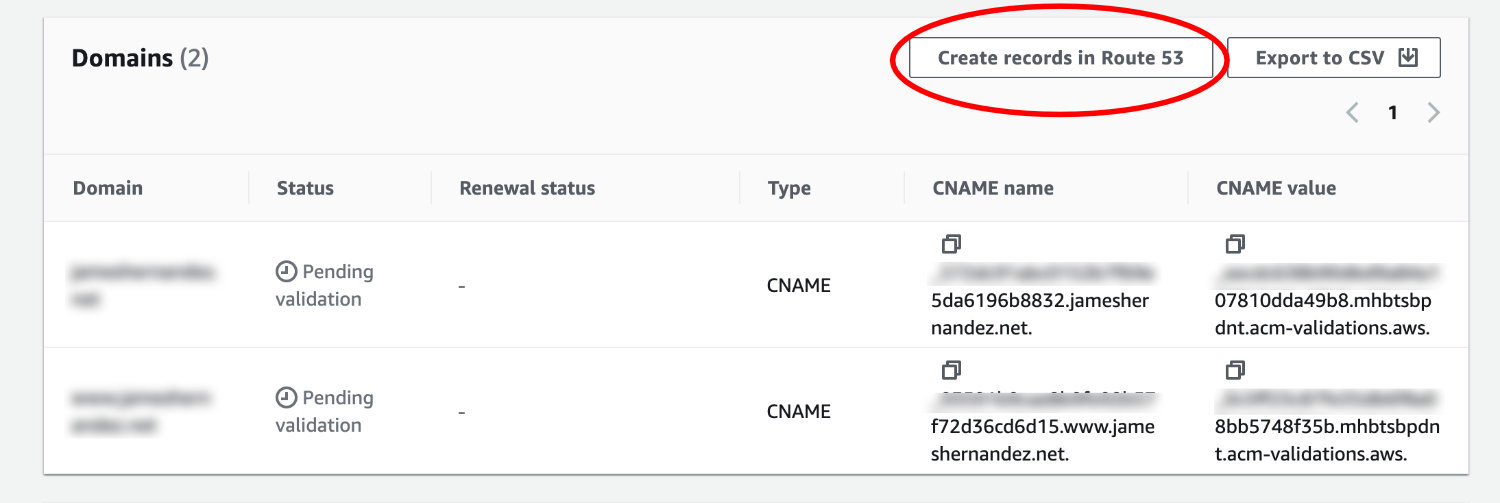
You'll be presented with a list of your certificates, except the one you just created! Don't panic. There should be a notification at the top and you should click the option 'View the Certificate'. Initially the CNAMEs may be blank. Just refresh a few times and they should appear.
This part is important. Select 'Create records in Route 53'. (You can insert them yourself, but it's very easy to make an error. Better to let AWS just do this for you.)
You'll get a confirmation screen. Select 'Create records'.
Once you have done this you can go back to your list of certificates. (If your certificate doesn't appear, make sure you have selected the right region, which is at the top right by your name. )
You're going to need to wait until the status of your certificate is 'Issued'. Be patient. This may take up to 30 minutes. (In my experience, if it takes longer then something has gone wrong, and you should begin troubleshooting.)
§ Setting up Cloudfront
Once the status of the Certificate is listed as 'Issued', you will need to create a Cloudfront distribution. This is the only way we are going to be able to use an SSL certificate with Route 53.
Go to AWS > CloudFront.
Select 'Create distribution'.
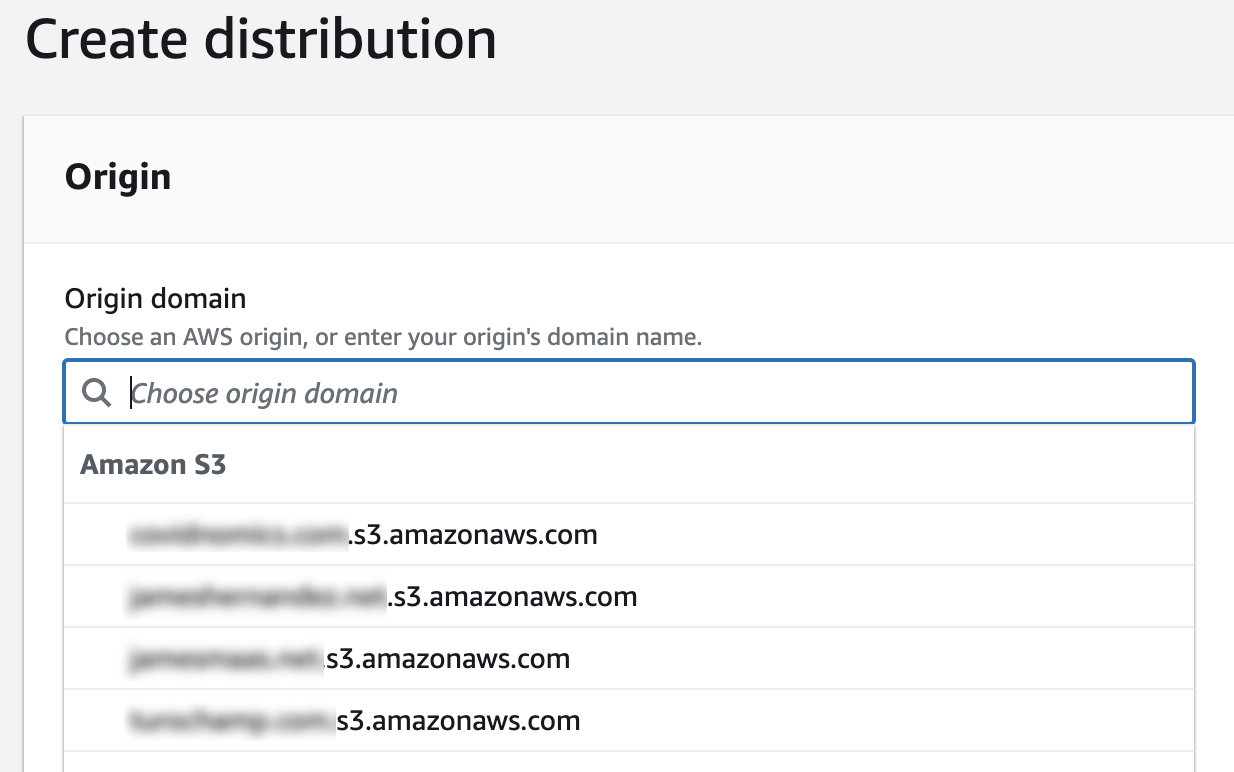
For the option 'Origin domain', select the appropriate S3 bucket. If everything has gone correctly, you should see it in the dropdown list.
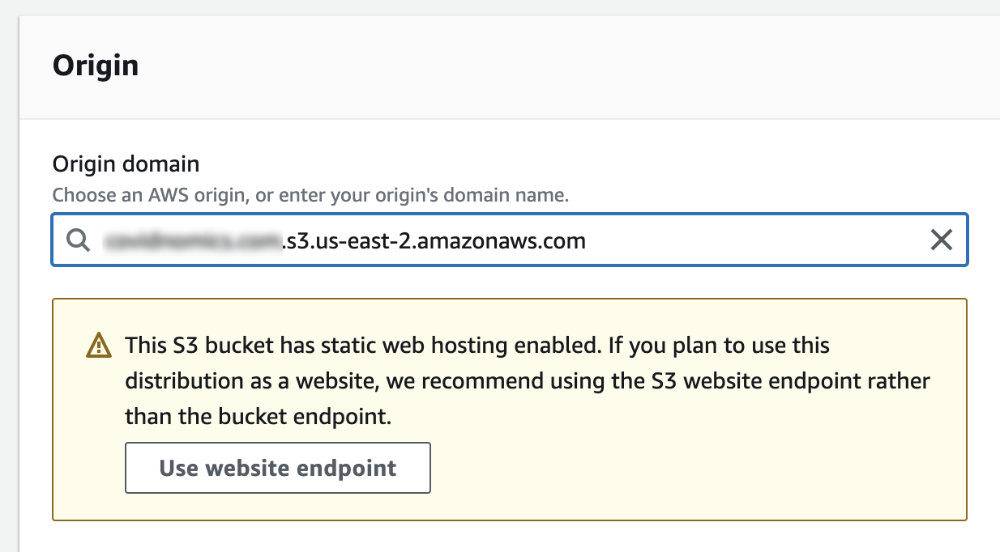
This part is very important. When you have selected your bucket, you will be presented with an option to 'Use website endpoint'. Click it!
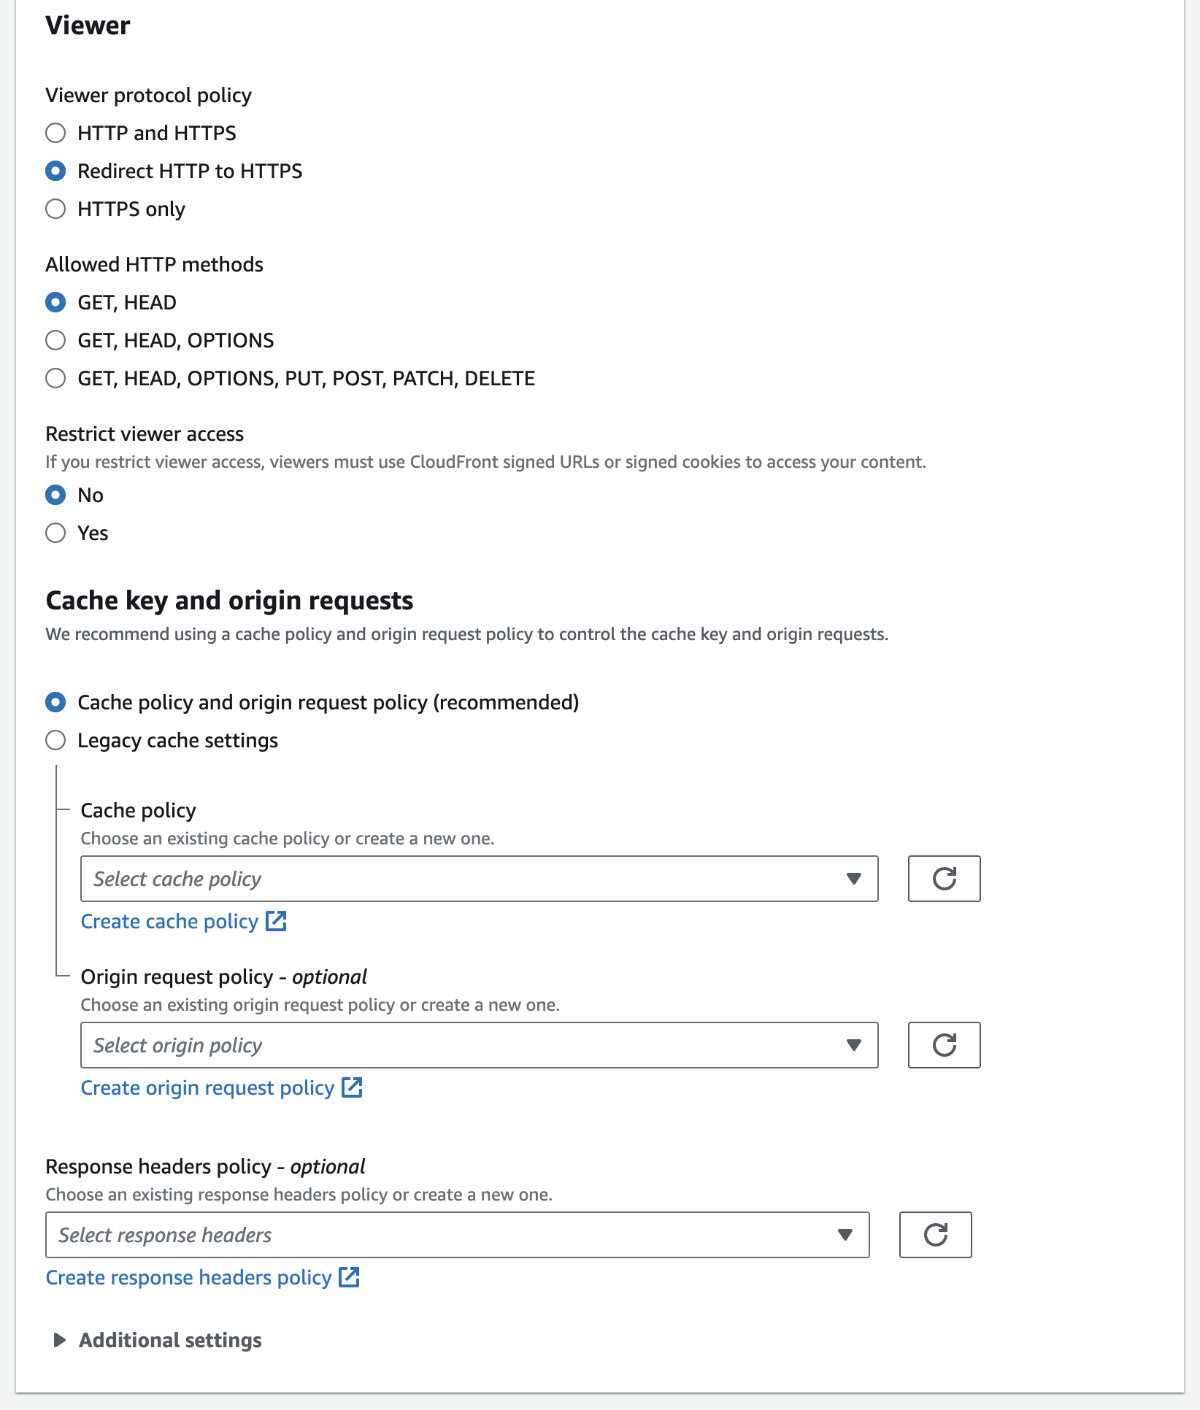
Keep all the other options default, until you get to 'Viewer protocol policy'. Select 'Redirect HTTP to HTTPS'.
Keep 'GET, HEAD methods'.
Keep all of the defaults.
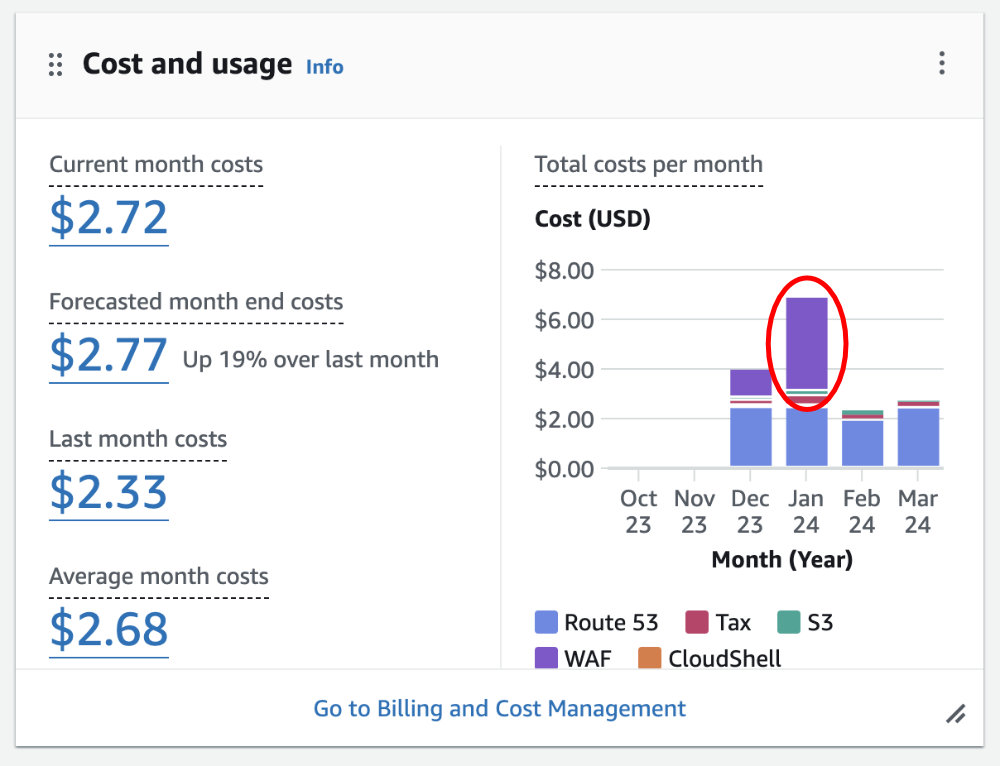
For 'Web Application Firewall', this is important because this can be the most expensive part. Make sure to click 'Do not enable security protections'.
If you keep WAF on, it can significantly add to your monthly costs.😱
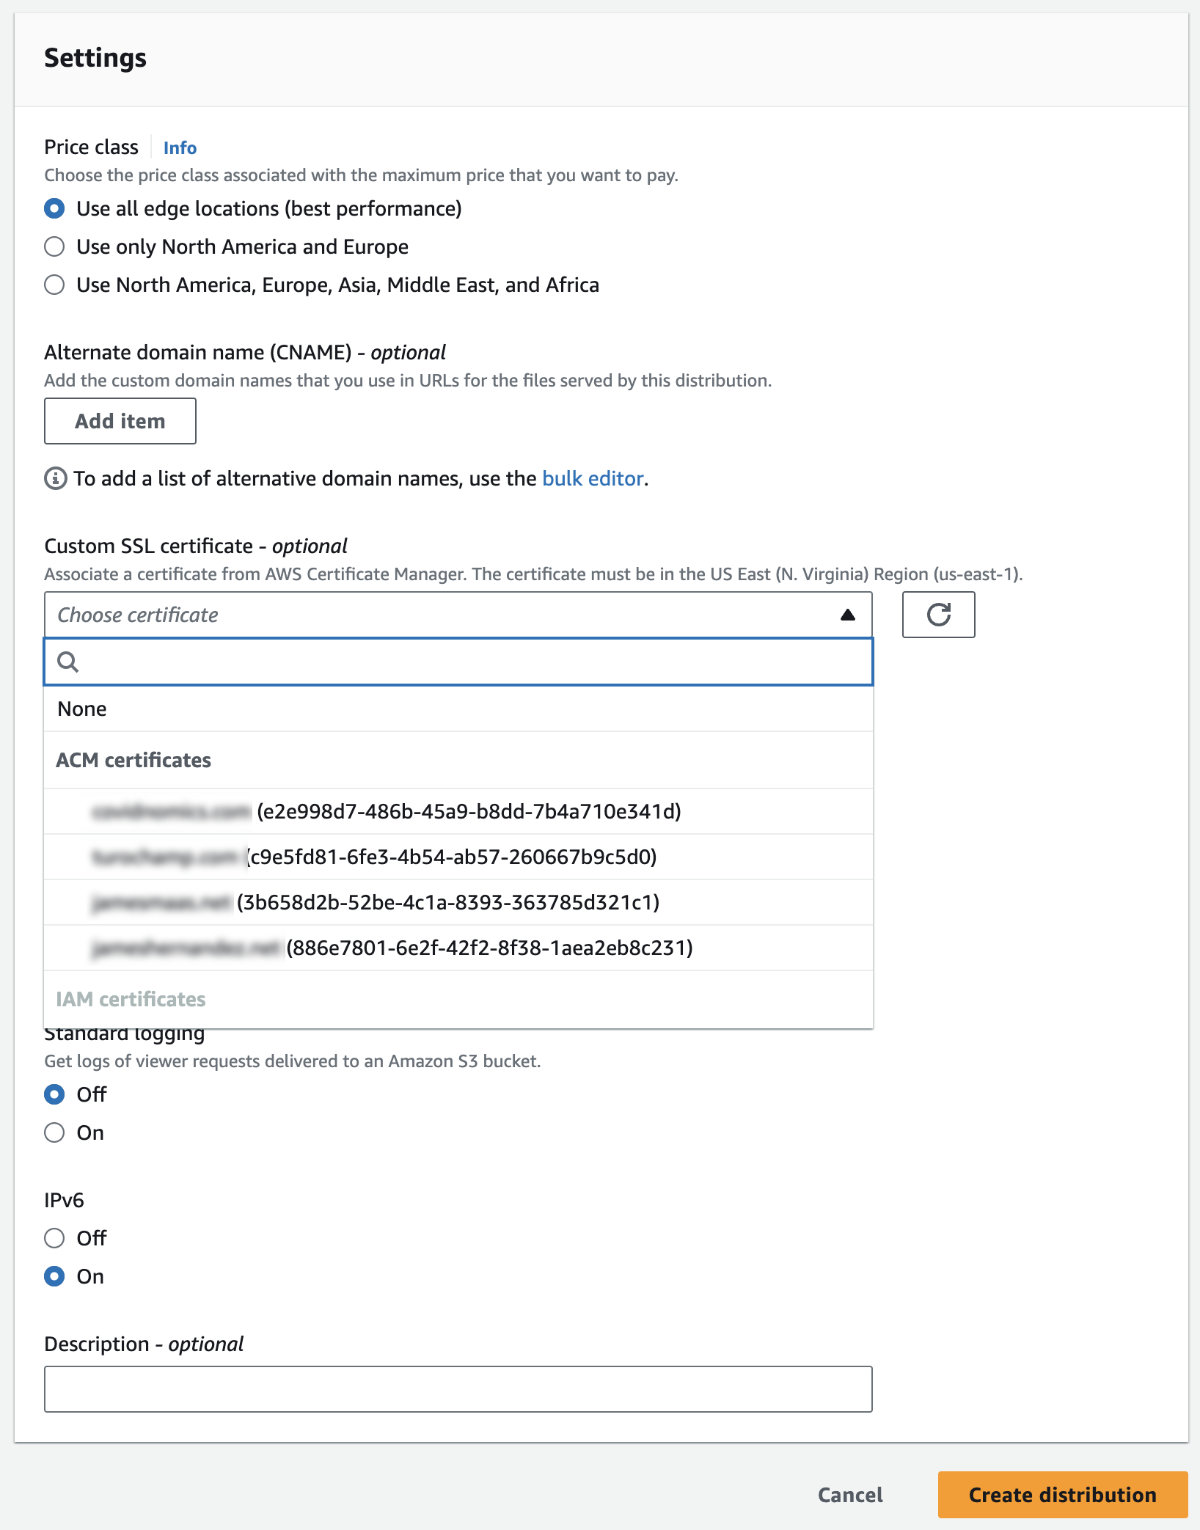
For Custom SSL certicate, select the certificate you just created.
For Supported HTTP versions select 'HTTP/2 and HTTP/3'.
Select 'Create distribution'.
§ Last Step — Route 53 Again!
Now you're on your last step. Go to Route 53 > Hosted zones > yourdomain.com.
You should have 4 records, including the two CNAME records you created earlier. You're going to create two more.
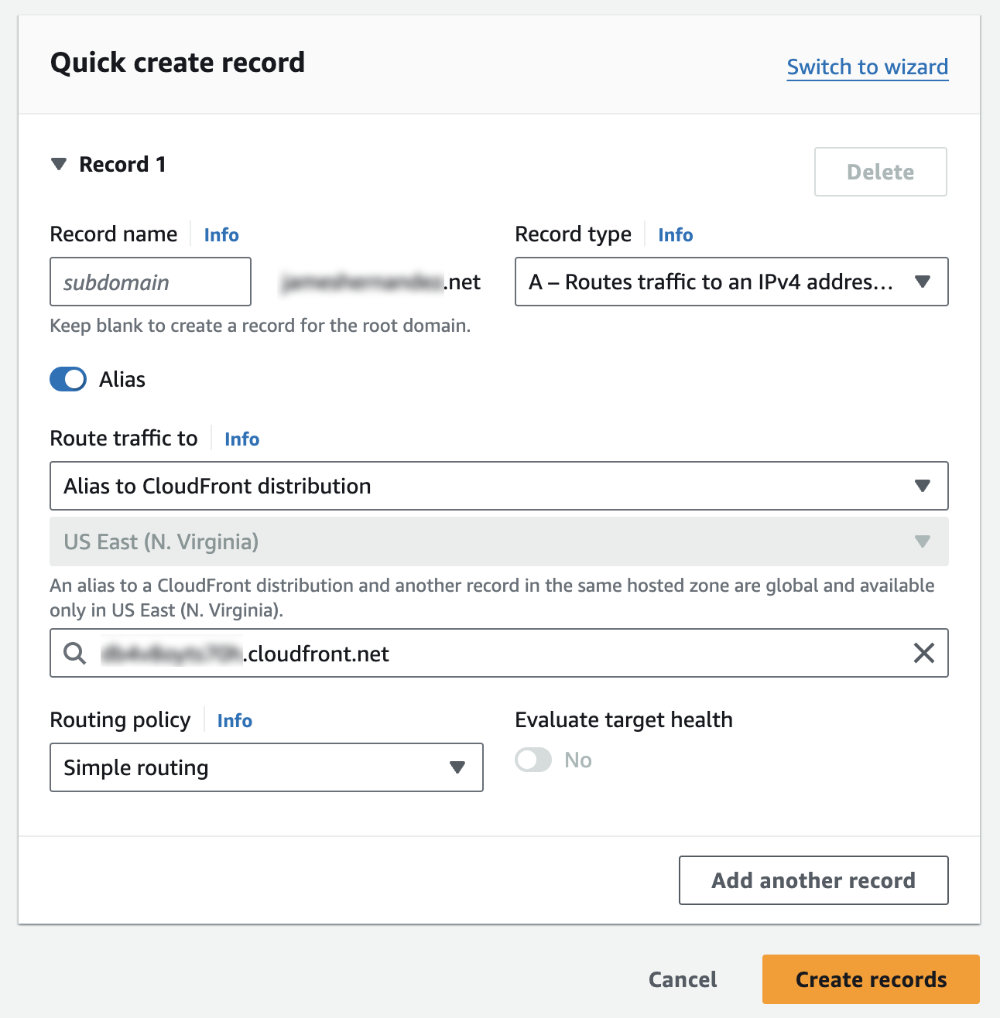
Click 'Create record'.
'Record name' should have subdomain blank and 'Record type' should remain 'A'.
Turn the 'Alias' option to on.
For the option 'Route traffic to' select 'Alias to Cloudfront distribution'.
For the distribution, you should see the cloudfront distribution associated with your domain name. If you do not, something has gone wrong, and you should troubleshoot.
Keep the Routing policy default and select 'Create records'.
Create one more record just like it, except for the Record name, enter 'www'. This is to ensure users who type yourdomain.com and www.yourdomain.com are routed to the same site.
Good luck!
